Thursday, September 17, 2020

How to Give Yourself a Relaxing Facial at Home


Have you ever wanted to recreate the relaxing environment of a spa in your own home? So, you don't have professional grade skincare equipment or fountain in your bathroom, no biggie! You can still give yourself an amazing facial with things you probably already have at home (even if a certain global pandemic keeps you from the spa). Here are my tips for recreating a luxury spa experience with some tips and tricks I've picked up while working in a variety of spa environments- including a boutique, luxury hotel spa. 

This color-changing oil difusor helps set the mood and is safer than candles.


You will need: 
  • Essential oils (Lavender and eucalyptus are spa favorites!)
  • Calming music -if you don’t have a playlist, Marconi Union’s album "Weightless (Ambient Transmission Vol. 2)" is my go to and supposedly can trigger rem sleep, it works well for most of my clients. I also really like Epik High’s album "Sleepless in _________ " (there’s a song at the end that’s been proven to put babies and animals to sleep!)
  • 2 Facial cleansers (oil or balm to loosen oils and any makeup and a foaming one for a deeper clean)
  • Exfoliator (a facial scrub, or enzyme mask can be used or even just and exfoliating cleanser) 
  • Toner (to keep the pH balanced depending on your cleanser or add hydration between final steps)
  • Facial oil like jojoba or olive oil(this can be used several ways- oil cleanser, for facial massage, to make a mask, and to add moisture at the end of your facial) 
  • Face mask (or make one with 1 tbsp olive oil and 1 tbsp of honey or mix in 2 tbsp of ground oats (plain instant oats work fine) and add water to form a thick paste and a little aloe vera gel for rosacea or sensitive skin)
  • Eye cream (if you use it) 
  • Serums/spot treatment (as needed) 
  • Moisturizer 
  • Lip balm
  • SPF (if it’s day time)
  • 2-4 towels (wash cloths work fine, and you can always rinse and reuse them to save on laundry)
Some song recommendations for a relaxing mood...

Depending on your skin condition and what you have on hand you can customize this to fit your needs. Some options include, clay masks for oily/acne prone skin and sheet masks for dry or dehydrated skin. Avoid using scrubs on broken skin or with active acne because it can spread it and instead use an enzyme or acid-based exfoliant or just move onto the mask (the honey/olive oil combo is great for acne!). I recommend wearing an old tee shirt or spa wrap that you can easily wash so you don't have to worry about getting any product or water on your clothes.


A few of my current favorite products you'll need: jojoba oil for massage, a cleansing balm, and an enzyme exfoliating peel.

  1. Put on music and if you have a difusor add a few drops of essential oil (or mix a few drops with a small amount of oil and apply directly to temples, wrists, and neck)
  2. Take 3 deep breaths 
  3. 1st cleanse w/ oil cleanser or balm- Massage well to loosen any oils, dirt, makeup, then with wet hands massage it in again to emulsify the oil, & remove with a warm wet towel 
  4. 2nd cleanse w/ foaming cleanser -dispense to wet hand to create lather, apply to face and massage well with circular motions for 2-3 mins, and rinse thoroughly 
  5. Tone (mist directly onto face or use cotton rounds)
  6. Exfoliator -apply scrubs and massage in with circular motions for 2-3 mins, while for enzyme or chemical exfoliants apply and let sit like a mask for no more than 10 mins, rinse well or use another warm towel to remove 
  7. Facial massage with oil- first using smooth upward strokes and flat hands to distribute the oil, next pull outward horizontally from the center of the face, trace around the eyes, across the forehead, and make small circles at temples. For a cooling sensation you can use a jade roller if you have one too -if your skin is oily remove the excess with another warm towel otherwise let it soak in.
  8. Apply mask leave 10-20 mins- don’t let clay masks fully dry and crack or they with over-dry and dehydrate the skin. Use this time to relax the most, take a few more deep breaths, and listen to the music and smell the essential oils. You can also use this time to massage your shoulders or do some light neck stretches. Rinse and remove excess with warm towel- do NOT rinse after a sheet mask!
  9. Toner (again for sheet masks you don’t want to remove the essence so don’t use anything astringent or with cotton, apply directly or skip this step all together)
  10. Eye cream- apply with light tapping using your ring finger along the orbital bone of your eye 
  11. Serum and/or spot treatments 
  12. Moisturizer 
  13. Lip balm and SPF 30 or higher (although you'll probably want to just go straight to bed!)
This is meant to be a relaxing facial to help nourish and calm your skin and mind. As an esthetician I don't really recommend doing a lot of extractions or any deep exfoliation at home, because it's easy to take it too far which can lead to scarring or damage your skin's barrier function (especially now as it may be hard to get into your esthetician or dermatologist for help). So remember to be gentle and take this time to treat yourself with care. Good luck!

Sunday, April 19, 2020

Lash Help Series: How to Get Your Natural Lashes Back


As anyone who's tried eyelash extensions can probably tell you, the worst part is getting used to your natural lashes again once the extensions are gone. Whether it's due to irritation, lifestyle, or a certain deadly virus that shall remain nameless which has your lash tech out of work and unable to get you in for fills... you probably won't be able to keep your extensions up forever. That said, here are some tips for getting your natural lashes back on track for long, healthy, full eyelashes, regardless of their current condition.

A nice before and after that would work just as well the other way for post-extension goals.

1. If you still have a lingering extension (or four) that's just too stubborn to come off on it's own, please do not just rip it out! Not only will you lose the natural lash prematurely, but you also risk damaging the follicle which could later affect lash growth in that spot! Instead, try applying a little bit of coconut oil with a q-tip and gently working it off from the base. Whatever you do, don't cut them either because it will just make them blunt-looking and even more noticable.
***the first thing you learn when doing lashes is patience and this goes for removal too!

2. Nourish your natural lashes with coconut oil (I prefer this to petroleum jelly because it's more natural and works just as well for creating an occlusive barrier to lock in moisture and strengthen the hairs) or castor oil to boost lash growth. You can also try lash growth serums like Grandelash or the popular one from Rodan & Fields, but keep in mind these might cause subtle pigmentation or irritation along the lash line.

When the damage has been done and you're due for some serious re-growth!
3. For more damaged lashes, try to limit the use of your eyelash curler and mascara (especially waterproof or longwear formulas which can be drying) as the pressure and stimulation can cause even more damage. Opt for bare lashes as much as possible or try a more nourishing/strengthening mascara formula. I prefer mascaras from more natural brands like Jane Iredale, Tarte, Pacifica, or Neutrogena's Healthy Volume mascara.

4. If you're really missing your eyelash extensions try strip lashes instead. There are a lot of high quality ones available nowadays in a variety of styles that can even be reused if you keep them clean. Just make sure you attach them properly to the skin at your lash line and not directly on the hairs to avoid any damage.
A mini version of a lash pillow a picked up a trade show, it allows you to sleep on your side without crushing your lashes.

5. Lastly, remember to keep up your good lash habits. As tempting as it might be without your extensions, don't rub at your eyes! This is still just as bad for your delicate skin around your eyes and can harm your fragile natural lashes too, and it's another reason not to touch your face. The same goes for sleeping on your face (which can also cause premature wrinkles if you need one more reason to kick the habit).

So remember to be gentle and by being a little more accepting of yourself and your lashes, you'll see results in no time!

Saturday, November 23, 2019

Lash Help Series: Keep It Clean

Lice in your lashes? It's more likely than you'd think!                


As part 2 of my special series on eyelash extensions, I wanted to delve deeper into a current issue that's come up about cleanliness. There's been some recent articles talking about the increased risk for lice in lashes, and what comes to a bit of a surprise to some of my clients is that it's not unheard of!

These are some lashes I removed from a client from another salon. There was no separation and just more and more glue and extension piled on each other which caused them to clump up and pull out her natural lashes when any needed to shed. She was unable to comb through and the build up from lack of cleansing just added to the mess!
Yes, it's incredibly rare for it to get that bad, and eyelash extensions can make your routine go much faster, they still require special maintenance. You don’t want end like one of those horror stories we see online who lost all their natural lashes or ended up with an eye infection either! So how do you avoid this? Beyond the basics of regular fills with a reputable lash technician who keeps your extensions looking full, anyone in the beauty and wellness industry will tell you it really comes down to homecare. Remember, you wouldn’t stop washing or detangling your hair if you got hair extensions or not wash your hands anymore because you got acrylics, eyelash extensions are no different. 

It can definitely take some getting used to, people often rely on mascara which keeps their lashes in place and is later washed off or don’t worry about their natural lashes at all if they never touch them. So, imagine you glued on strip lashes (aka falsies) and then never took them off. Strip lashes are not designed to stay on more than a few hours, the adhesive goes directly on the skin and isn’t strong enough to last much longer than that, but by applying individual extensions to your hairs with a super glue-like adhesive they are able to last the entire life cycle of the hair. This means that makeup, dead skin, and crustiness can build up along your lashes along with lint and even dust, especially when thick extensions clump up or tangle at the base of your lash line. Gross, right? 

So if you’re the type of person to sleep with your makeup on and make your mascara last a couple days per application, then eyelash extensions are going to be more work. 


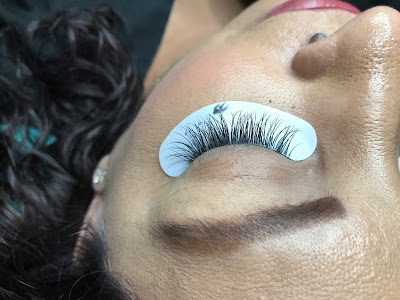
What healthy eyelash extensions look like.

Beyond the first 24 hours that some lash adhesives require to be kept dry in order to cure, you need to be cleansing your lashes at least a few times a week. Many lash companies make their own extension-safe cleanser that your lash tech will probably recommend. Stay away from drying, exfoliating face washes or oil-based eye makeup removers which can break down the adhesive. However, if you’re on a budget regular Johnson & Johnson baby shampoo works great and won’t irritate your eyes.

To cleanse: gently rinse your extensions with cool water and foam up a small amount of cleanser and work in with your ring finger, which has the lightest touch, and rinse. You can also use lint-free microfiber Q-tips to work off any stubborn build up. Finally brush out your extensions with a clean spoolie brush. 
***Remember, it’s equally important to regularly brush your extensions to prevent twisting, tangling, and keep build-up from collecting.

Partial sets like this one can also add fullness and length without looking super patchy when they grow out.

Some people still avoid properly maintaining their lashes for fear that it will make them fall out faster. This is often the biggest concern for new lash clients, (and rightfully so, you just spent over $100 to have them attached in the first place!) but that should not stop you from keeping them clean. Don’t confuse fallout with regular lash shedding, which means your lashes will continue to naturally fall out with the extensions still attached and a new hair will soon take its place.

Regular fills will keep your lashes looking full, so unless you’re losing lots of extensions without the natural hair attached or if you’re experiencing discomfort and they are getting pulled out early with overzealous brushing, try not to worry too much when you lose a few. It’s better to lose a few more here and there with regular maintenance than have them all stuck together and unable to shed naturally which in turn leads to build up, pulling, and even gaps in natural lash growth. Plus it makes it a lot harder for your lash technician to perform fills if you come in with a tangled,dirty mess of extensions!

Remember, eyelashes are not much different than the hair on your head and with extensions they can twist and tangle just as easily, so treat your delicate eye area similarly, just with a more gentle touch. This does not mean you should blindly scrub them in the shower or rub them vigorously as you wash the rest of your face, instead just set aside a little extra time when you wake up in the morning, maybe after you brush your teeth and wash your face, to care for your extensions. Your lash technician and your lashes will thank you for it in the long run. 

Let’s face it, no one wants to be the poster child for lash lice!

Friday, November 22, 2019

Lash Help Series: Are Eyelash Extensions For Everyone?


While this has been and will continue to be a skin care blog, I wanted to expand to cover some other services that I've expanded into as an esthetician over the last few years. Eyelash extensions are a huge trend in the beauty industry right now and only getting bigger and more commonplace. What started out for me as a way to fill some time and learn another skill has quickly become one of the main parts of my business. There's hardly a day that goes by that I don't have a lash appointment on my books, and I've learned to love it almost as much as my passion for skincare. I thought I'd take this opportunity to share some of my knowledge in this new Lash Help Series I'm creating to answer FAQs and some questions people don't always think to ask before scheduling a lash appointment.

The difference even a natural set of eyelash extensions can make.

So without further ado, here is my list of top FAQs that you should know before getting eyelash extensions:

-What are they?
Synthetic eyelash hairs glued individually onto your natural eyelashes for longer, fuller looking lashes. They can be done with single individual hairs, clusters or custom fans of lashes, in a variety of lengths, thicknesses, and curliness, and are typically black. Eyelash extension are designed to take the place of false strip lashes and/or curling and applying mascara, and even the need for eyeliner. Great for low maintenance and glam-looks alike, whether you're going on vacation and want to streamline your routine or have a special event and want some added drama.

-What are "fills"?
Much like nail appointments, regular touch ups of "lash fills" are needed to keep them full and healthy. The lash technician should remove any twisted, grown out extensions and apply new ones to the new growth. Through normal wear and tear the extension may twist or loosen and will eventually fall out. Since the lashes are glued on individually to your natural lashes they will come off when they shed. You will probably lose some without the natural lash as well. Fills are recommended about every 2-4 weeks, depending upon the person. If you're gentle with them they can last longer, I've known some to stay on for months after all the others have fallen out! 

-Do I have to do anything to them at home?
Not much! Keep them free of tangles and buildup of any dead skin, makeup, or eye crustiness. Regular (gentle) brushing with a clean spoolie mascara wand and light cleansing at least a couple times a week (more if you're getting them dirty) will do the trick. You won't have to curl your lashes or wear mascara anymore! Actually, we recommend that you skip it entirely. Curling can break the bond made by the glue and most mascaras and eyeliners are too thick and can break down the adhesive when you try to remove it. If you must, wear something from a natural line without carbonates or oils and remove it with a gentle cleanser like Johnson & Johnson's baby shampoo or use a product from a company that makes eyelash extensions. (The same goes for eyeliner, waterproof liquid eyeliner is one of the toughest things to remove from your extensions!)

A couple before and afters on new clients of mine.
-Will they damage my lashes?
When done right and well maintained eyelash extensions will not damage your natural lashes. However, if they are too thick or heavy for your lashes or have clumped up with excess glue or build up, it can become an issue. A good lash technician will check for these signs during fills, and might recommend you come in sooner rather than later to keep them fresh and healthy. Separation is key, again make sure you are regularly keeping them clean by brushing them out and cleansing to remove any residue. This will also help them last longer.

-Do they have to look like caterpillars?
I get this a lot from first-timers, but it's important to have an idea of the look you're going for before your appointment- and what you don't want! Take a look at pictures of extensions your technician has done before or at others on Instagram to get a feel for what you like. They can be super full and dramatic like falsies or more natural and subtle. They can open up your eye in the middle or be flared out on the end in a cat eye. For the most part it's best to start subtle and work up from there, you can always add drama with a fill. Remember, they will get a little longer as they grow out.

Some recent lash work I did, some volume, some more subtle and natural.
-Can it make me look like a Kardashian?
It depends on your natural lashes and eye shape, so you have to be realistic. A good technician matches the extension to the natural lashes, making them longer and darker than what you've got. As much as you may want the longest, fullest lashes known to man, if you naturally have very thin, fine lashes that can hardly be seen with the naked eye, you're going to have a tough time maintaining it. Lashes that are too long or thick can weigh down your natural lashes and cause breakage, which means even shorter lashes! Also, it's common to have one eye with more lashes than the other, and extensions can emphasize this, so let your technician know of any areas you'd like to correct or balance out beforehand. 

-Anything else I shouldn't do?
Don't rub your eyes, spray them in the shower, and no crying-if you can help it. I've have clients lose all their lashes the next day because the water from their tears affected the adhesive, it's also nearly impossible to apply extension to someone with teary eyes. If you have allergies that often cause itchy, watery eyes then extensions might not be for you. Most adhesives require you to keep your lashes dry for the first 24 hours, others set with water, but any friction on the lashes will loosen them, causing them to fall out faster. (Which also relates to the no mascara rule above). Don't sleep on your face! In addition to friction, the pressure and movement from tossing and turning on your lashes can make them fall out faster, and if you sleep on your side you may notice that one eye loses them faster than the other. When in doubt switch to a silk or satin pillowcase or try a neck or lash pillow to keep the pressure off your face. It's a hard cycle to break, but sleeping on your back will also help prevent wrinkles too!


Who should not get eyelash extensions?

Anyone with extreme eyelash loss. I've had clients recovering from loss of eyelashes ask about extensions and I always tell them: whenever your lashes are growing back from any kind of trauma they may not come in consistently at first. Patchy lash growth can lead to patchy looking extensions since we need natural hairs to attach to, so again it can be worth waiting few weeks until there are fewer noticeable bald patches before trying extensions. Instead, try a lash serum or castor oil to grow them back first or reusable strip lashes in more subtle lengths or clusters might be a better option. 
   -Side note: You don't want to use lash serums while you have extensions on, as this can affect the adhesive. Instead, stick with a vitamin supplement for hair and nails to increase lash growth, but remember it can also increase the speed of your lash turnover which means they'll grow out and shed faster too.

Damaged eyelashes. A good technician can apply lasting lashes to even the thinnest, shortest lashes, but where it becomes an issue is when you have breakage. Whether it's from a bad set of extensions or poor lash health, stubby broken lashes should have time to bounce back before you go out and get a set of extensions. 

If you're like me! Yes, despite knowing all this and several trials as a lash model or guinea pig for my co-workers, I'm actually a terrible lash client. I have really bad seasonal allergies-regularly- and my eyes that water all the time, and if it's not from that, it's because I cry at everything including sweet dog commercials. I also am a side or stomach sleeper, and never have time to get in for fills because I'm always working so they usually just fall out and grow out. I wear a lot of eye makeup on a regular basis or at least liquid eyeliner, which is really hard not to get on your extensions. So I cake on the (waterproof) mascara and get to put extensions on everyone else for a living!


Her lashes were amazing to begin with so the extensions just enhanced it.

As always feel free to leave any questions you have for me! I plan on going more into depth on this in the coming posts which will hopefully be more frequent and less of an info dump followed by radio silence in the future!

Friday, January 27, 2017

New Year, New Skin? How to (Help Your Skin) Bounce Back

For lack of a better photo, here's a cute picture of my dog, Tallye reminding you to bounce back and make healthy choices!

How are your New Year's resolutions going? Personally, I'm feeling a little behind, I can't believe it's already the end of January! (I originally wanted to post this at the start of the new year, but I'll go for the Lunar New Year instead! Happy Year of the Fire Rooster!) So whether you're well on your way to a new you or have already given up on your resolutions, it's not too late to make healthy skin a priority! I've got some quick skin care tips to help you stay on top of things without having make any drastic changes- like certain fad diets and crazy exercise plans!     

  •      Breakouts! - Sleeping with your makeup on, too much rich food, or even just stress can lead to some unfortunate consequences- acne. Banish breakouts with tea tree essential oil applied directly to the blemishes. If it feels a little too intense on its own you can always add a drop of jojoba or olive oil on top to dilute the potency a little. This is my favorite spot treatment, especially on the painful zits you feel coming for a day or two. 
    •       A purifying clay mask can also help to draw out impurities and control excess oil product to clear the skin. Remove with a warm compress and then add the tea tree spot treatment.
  •       Dry, Dehydrated Skin! - Cold winter weather is notorious for turning your formerly balanced skin dry and flaky. Countering it with the heater blasting dry air inside doesn’t help either! So, to combat the lack of humidity and try an enzyme-based gel mask to gently exfoliate your skin. I like to apply mine right after a steamy shower for an at-home facial experience. Follow it with a rich moisturizer before bed, and let your skin recover while you sleep.
  •            Dull and Greasy Skin! - Alcohol and caffeine too often go hand and hand, especially during the holidays, so if you've overindulged recently your skin is likely dehydrated. On combination skin this can lead to dull, patchy dry spots and excessive oil production. This can be super frustrating to deal with, especially when it seems to contradict itself. Try a hydrating sleeping facial to get some good moisture back into your skin and balance out the oil. A brightening sheet mask can also do double duty to exfoliate and control oil.

As far as product recommendations go, my first advice is (as always) to check what you have on hand. CVS and Target have some great single use mask options (I’ve yet to find one I didn’t like!). Or you can always put that Sephora gift card to use!
Here are a few of my favorites:

-KORRES Greek Yoghurt Advanced Nourishing Sleeping Facial- This is great on long flights, while the wild rose one brightens and is a good option for aging skin types.

-Dr. Jart+ Sheet Masks- I like the Pore Minimalist Black Charcoal one and the Brightening Infusion Hydrogel Mask, but they make a few good hydrating ones I’d like to try, too!

-Peter Thomas Roth Cucumber Gel Mask- This is great for all skin types and has natural enzymes to gently exfoliate.
http://www.sephora.com/cucumber-gel-mask-P382204?skuId=1560879&icid2=products%20grid:p382204


Thursday, November 10, 2016

Top 5 Most Common Skincare Misconceptions

Notice it says "toothpaste" not acne treatment!

There are a lot if crazy beauty and skincare myths out there, from using rubbing alcohol as a toner to toothpaste as an acne spot treatment, and I’ve heard more my fair share as an esthetician. A few years ago model, Suki Waterhouse shared the secret to getting the perfect beachy waves in her hair: pouring Coca-Cola on it! While the more
far-fetched and outlandish tips aren’t often used, here are a few common misconceptions that even some of the most dedicated skincare junkies believe:

1.     If it hurts, it works! - You know that burning sensation you get with a strong acne treatment or exfoliating mask? That’s not always a good thing. There is a common misconception amongst people with troubled skin that you have to feel a product “working”. In reality, redness, irritation, heat, or a burning sensation is actually a negative reaction and your skin’s way of telling you the product is too intense for you. In some extreme cases frosting can occur, which where the skin starts to almost foam, this is also known as cell death! A slight itchy or tingling sensation is normal with some stronger acids, however anything that leaves your skin blotchy, red, and irritated isn’t doing you any favors. Acids such as Glycolic, Lactic, and even Salicylic are common exfoliants in promoting cell turnover and revealing brighter more even skin, but can cause adverse effects in higher percentages. This does not mean these products or ingredients cannot still be used in moderation, just as leaving a mask or peel on too long can take it from effective to irritating. Overall, it’s better to err on the side of caution and remember, red means stop when it comes to skincare (it doesn’t just apply to road safety!).

2.     Oily skin doesn’t need moisture- This is one of my biggest pet peeves. Everyone’s skin can get dehydrated, (it’s not just from not drinking enough water!) and the first thing your skin does to fight dehydration is produce more oil. Most skin care lines target oiliness with drying acne-fighting ingredients, astringent alcohol-based toners, and mattifying products at every step. This level oil-control is often what causes an increase in the skin's’ production of oil as it tries to balance itself out. If you identify as an oily skin type, ask yourself, does your skin feel dry or tight right after you wash your face and super oily in the afternoon? Or do you find that your skin is simultaneously oily and flaky? Congratulations! You are not a true oily skin type, this condition is actually caused by products you are using on your skin. So start hydrating! The best place to start is cutting out the mattifiers and limiting that super foamy cleanser by switching to a gentler skincare line. Adding in weekly hydrating masks and a cream or oil-based cleanser can also help balance things out. True oily skin types can also benefit from this gentler approach, an oil-based cleanser is a great addition to your routine, as oil attracts oil and a thicker moisturizing night cream will help your skin balance itself and restore moisture as you sleep. You can still use a lighter moisturizer during the day, even something oil-free, just don’t load on the mattifying products, instead try blotting sheets when you start to feel greasy. While there’s a difference between a “healthy glow” and looking like a glazed donut, being able to feel moisture in your skin is actually a good thing!

2.1  You need to dry out your zits to clear them up- As stated above, no matter your skin type don’t forget to hydrate! Believe it or not, your skin will heal itself naturally, if more slowly than you would prefer. By not moisturizing acne-prone skin you are just as likely to worsen breakouts by overdoing it with too many drying ingredients like Salicylic Acid, Benzoyl Peroxide, and Glycolic Acid- which all promote exfoliation and cell turnover- but can lead to dry flakey patches on already irritated skin. It’s all about balance, one spot treatment twice a day with your normal skincare routine and the occasional clay mask is better than using an entire line of acne-fighting skin care that doesn’t properly hydrate or moisturize. When your skin is getting inundated with drying, exfoliating, and purifying ingredients at every step, it’s no wonder your skin is simultaneously dry, flaky, oily, and broken-out! Give your skin a break to bring down the redness and help your skin heal itself. Look for ingredients like: cucumber, glycerin, hyaluronic acid, green tea, and jojoba oil which hydrate and calm without being too rich. This will also help you maintain a balanced moisture barrier instead of stripping it, which causes more oil production, and on acne-prone skin that means more breakouts!

This is what over-doing it looks like for oily/acne-prone skin: everything is targeting the same issues and nothing is adding moisture back in.

3.     Scrubbing=Exfoliating- In some cases a gentle scrub used in the shower is great for promoting cell turnover (see the Simple exfoliating scrub or Yon-Ka’s Guarana Scrub), unfortunately, more often than not they are used too often or are too harsh for most skin types. Some “facial” scrubs cause micro-tears, broken capillaries, and can even spread active breakouts (I’m looking at you St. Ive’s Apricot Scrub!). Instead try an enzyme based peel once a week or go the European route with a gommage which peels off dead skin cells like pills on a sweater and is gentle enough to be used daily. Also, if you are using a moisturizer or serum with exfoliating ingredients (such retinols, glycolic acid, lactic acid, papaya or other fruit enzymes) you do not need to exfoliate as often, so unless you are seeing lots of flakiness or peeling limit your exfoliating scrubs and masks to once a week. You can save the harsher scrubs for rough elbows, knees, and feet or to exfoliate before you shave to help prevent ingrown hairs and remove stubborn deodorant buildup in your underarms.

4.     You breakout because your skin is “dirty”- There are many contributing factors that can lead to breakouts in even the healthiest skin: hormonal shifts, excess oil production, not enough exfoliating, diet, stress, environmental factors like pollution, allergies or an allergic reaction, and yes clogged pores from not washing off makeup, dirt, and oil. You can experience a combination of these factors at once and they may change over time as your skin fluctuates and different elements come into play. Most teenagers breakout due to hormonal shifts caused by puberty which leads to an increase in oil production and cell turnover, as well as stress. These breakouts often persist due to lack of proper cleansing, exfoliation, and skin picking. Meanwhile, a woman in her 30s who perhaps just took a new job in a busy city might suddenly breakout due to environmental factors like pollution, stress, and diet. Menopause is another common hormonal culprit and can often lead to a change in skin type, such as oily to dry which makes balancing skin even more difficult. So while it’s important to wash your face twice a day with a gentle cleanser, regardless of your skin type, sometimes breakouts happen and you shouldn’t feel like it’s your fault. So next time you look in the mirror only to find what looks like Mt. Vesuvius cropping up on your face, remember all the possible culprits and take a gentler approach to clearing it up.

5.     Dark spots can disappear instantly/never will- For most people jury is out when it comes to clearing up hyperpigmentation and you probably fall into one of two camps. The first believe that they can instantly vanish away a troublesome age spot or post-acne scars with the right miracle cream or intensive facial peel. The other, more discouraged, group has usually tried a few options and now believes nothing can clear their dark spots and it’s pointless to try. In reality, hyperpigmentation can be lightened but not always completely cleared. That said, lightening agents and exfoliation can clear hyperpigmentation up or at least lighten older scars down to the layers where to melanin was triggered. More intensive peels which require downtime can remove several layers of the skin to reveal undamaged skin, just as stronger lightening agents like the controversial Hydroquinone can bleach the skin down to these levels. However, because this pigmentation is triggered by sun exposure you can still experience more scarring during the recovery time by not taking proper sun protection precautions or over-using strong bleaching agents. So what can you do? Start small, an exfoliating facial with a low-level lightening peel and/or microdermabrasion is a good way to see how deep the pigmentation goes. Next you can add a gentle lightening spot treatment to your regimen with ingredients like: Vitamin C (usually found in citrus), brown and red algae extract, daisy extract, licorice extract, mulberry, peony, retinol, or kojic acid. Some skincare companies have full lines devoted to dark spot removal, just remember to keep the more concentrated serums only on the hyperpigmentation, it doesn’t do any good to lighten the surrounding skin as well. Lastly, don’t forget the SPF! Most sunscreens are only active for about 2 hours in direct exposure, so you need to reapply, especially if you are working outside and remember you are still being exposed to UV rays in your car or on foggy days!


My Favorite Skincare Advice-

Now that I’ve covered what not to believe, here are a few of my favorite tips and tricks for better skin:

-Skincare doesn’t need to be expensive. A pretty package usually sells well, but it’s the ingredients that make the product. As seen in my last post, you can often find cheaper alternatives to pricier cult-favorites just by checking the labels or even looking into store brands. While sourcing ingredients and concentration is important, there are more and more affordable skincare lines available today that work just as well and in some cases better than the more expensive department store lines, (many lines are even owned by the same parent company). As I learned in marketing class, the store brand alternatives to big name top sellers not only contain the same main ingredients but are often manufactured in the same facilities.

-Do you notice shine throughout the day, but don’t have any blotting sheets with you? Clean brown paper napkins, disposable toilet seat covers, and even a tissue pulled apart into two separate layers can all work as blotting papers in a pinch. Just dab your face as you normally would, focusing on oilier t-zones and cheeks.

-Sadly, cosmetics and skincare products don’t last forever, but it’s good to change things up every once in awhile. Take a look at the expiration dates or symbols on your products; check the back of the packaging for a little picture of a jar with a number and “M” inside for months, this starts from the date opened. If it’s past this point, the potency is decreased and it can stop being effective. Anything not stored in an airtight container will not only age faster, but harbors bacteria, especially if you scoop it out with your fingers, (which can means an acne-fighting moisturizer can even cause breakouts if it’s old). Ever notice your favorite night cream go from liquid gold to just ‘meh’ after a couple jars? Your skin will becomes used to and even resistant to active ingredients over time, which causes your results to plateau. Ideally, you should try to switch up your one product every six months, or after a full jar is used. For example, if you’re worried about fine lines and age spots, focusing on one concern at a time will not only clear up things faster but will promote consistent results. This is not to say you need to completely revamp your skincare routine twice a year, but if you’re noticing less dramatic results, try switching up one or two products, or just wait until you run out.

The "6M" in the container means I have 6 months from opening to use this cleanser.

-As (American) consumers we are preconditioned to expect soap to foam (due to sulfates) - which gives the impression that cleansers don’t work otherwise, this is not the case. That squeaky clean feeling you get from some cleansers is because all of the oils (even the good ones) have been stripped from your skin. Remember, your face shouldn’t feel tight and dry after washing. Fortunately, the recent boom in cleansing oils is helping to change that perception. These, along with gentle milky cleansers are great for all skin types, it just takes some getting used to. The best way to use them is with the double cleansing method, especially if you wear foundation and have oilier skin. Start by applying them dry to absorb excess oil and add water to emulsify into a milky texture after you’ve worked it in (just like with shampoo) rinse and repeat. Or if you need to ease into it or struggle with clogged pores, try using a gentle foaming cleanser second for a deeper clean while still getting used to the feel of more hydration in your skin.

-If you feel a painful zit coming on you can bring down the redness and swelling with an ice cube for a few minutes and a drop of tea tree essential oil which also has purifying properties. Just remember to keep essential oils away from the eye area. This, along with your regular cleansing routine and a spot treatment can help speed up the recovery time, and in some cases clear the zit before it even come to the surface.

-Remember, your true age shows on your hands, neck, and décolleté. All the best skin care in world can keep your face healthy and young-looking, but don’t forget these crucial areas. While the skin on your face is the most sensitive, your décolleté is often exposed to just as much sun damage which causes the skin to age faster. That said, you don’t always need separate products for these areas, just bring your face moisturizers and SPF down further and rub any excess product into your hands.


As always, feel free to leave any questions or skincare concerns in the comment section below. I’m going to try to post more often during the holidays, so let me know any other topics you would like to see covered as well.

Saturday, September 10, 2016

They Say Beauty Is Pain, But Should It Really Bring You To Tears?

From drug store to high end: a few of my favorite masks

By now many of you have probably seen the video circulating the internet where the girl is screaming, cussing, and crying while trying to remove a face mask. It’s something anyone who has ever been waxed or tried a pore strip can relate to, but maintaining your skin is a lot easier when it doesn’t involve that level of discomfort! A face mask is one of the quickest ways to improve your skin at home, however as the video demonstrates, it’s important to choose the right mask for your skin type. From trendy Korean sheet masks to $60 jars of miracle treatments, trying to figure out which one to use can be a little overwhelming. Even the mask in the video can be helpful when used properly: only on clogged pores, after you exfoliate, and avoiding any areas with hair. You can also mix and match for combination skin types, for example a clay mask over an oily t-zone and a soothing gel mask over sensitized or dry, flaky areas. Thankfully, with all of these options it also means that there are plenty to choose from no matter your skin concern or budget!

As an esthetician and all-around skin care product junkie, I’ve been able to try all kinds of masks from high quality, professional-only treatments to dollar sheet masks found on the drug store beauty aisle. What it really comes down to is the ingredients. For most skin types I recommend masking no more than twice a week, especially with more exfoliating and clay masks. Otherwise it can sensitize your skin and cause irritation, which can also happen from leaving a mask on too long. So, be sure to always follow the label instructions and try not to get too sucked into Netflix while your mask is drying! Whether you can invest a chunk of your hard-earned cash or you just want to see what you can make from your pantry, here are a few of my favorite masks…

Single use masks at my local Target...so many options!


Oily Skin-

The most common masks (or at least the first that comes to mind) are the clay-based. They are typically green, known for drawing out impurities, and are usually reserved for oily and acne-prone skin. A combination of clays (kaolin, bentonite, and even sea silt) helps draw out excess oil while acne-fighting ingredients like salicylic acid or sulfur help to clear blemishes. On the down side, they can trigger a breakout before your skin gets better, so it's not always a quick fix. These masks can also be a bit too dehydrating on some sensitive skin types. However, if your skin is oilier and you have blackheads, just apply where you need it- it doesn't have to be all over the face.

$$$- Glam Glow Supermud Clearing Treatment- Great for oil control and acne; this cult favorite lightens in color as it dries and darkens as it absorbs excess oil, so you can really see it working. The $69 price tag means it also includes AHAs and BHAs, naturally derived chemical exfoliants which help improve skin texture, along with purifying eucalyptus and charcoal. You can find it here: http://www.sephora.com/super-mud-clearing-treatment-P376409?skuId=1473735&icid2=products%20grid:p376409

$- Boots Botanics Ionic Shine Away Clay Mask- A less expensive alternative to Supermud with naturally derived salicylic acid from willow bark and an incredibly short ingredient list. It has the same oil absorbing and acne-fighting properties at a fraction of the cost, (plus it changes colors just like it!). You can pick it up here, for under $10: http://www.target.com/p/boots-botanics-ionic-clay-mask-with-willowbark-3-3-oz/-/A-11202939


Acne-Prone Skin-

For more wide-spread or cystic acne (like the big ones that form under the skin), I recommend a more concentrated mask, preferably one that is dual purpose to clear the skin faster. When I have a lot of active breakouts it’s hard to leave my skin alone to let it heal, I just want them gone! So, to stop myself from causing more damage, I reach for a clay-based mask with strong acne-fighting ingredients that I can see and feel working. 

$$($)- Murad Acne Complex Clarifying Mask- I like to think of this one as the old stand-by, I’ve been using it for years, but really learned to appreciate it in esthetician school where we used it as our go-to for acne-prone skin. It has salicylic acid and sulfur to fight acne-causing bacteria and exfoliate deeper blemishes (you’ll smell the sulfur but don’t let that scare you off). It’s super thick and a little goes a long way; you can also apply it as a spot treatment and leave it on overnight to speed up the healing process as it helps bring down swelling and redness. It is not in the drug-store price range, but if you have persistent acne, it’s worth investing the $38; you can find it here: http://www.ulta.com/acne-complex-clarifying-mask?productId=prod2082346

$- Neutrogena Clear Pore Cleanser/Mask- Can’t do salicylic acid? It’s actually a more common sensitivity than you think, anyone allergic to aspirin or pregnant should steer clear and instead reach for benzoyl peroxide, which is just as effective. I discovered this one through my college roommate and was pleasantly surprised with the results and the price ($5.99!). You can use it as a daily cleanser or leave it on a little longer and it becomes a clay mask. Use it in the shower for best results and the steam will keep it from over-drying your face until you’re ready to rinse it off. Find it here: http://www.target.com/p/neutrogena-clear-pore-cleanser-mask/-/A-13337863


Dry Skin-

Is your skin dry? Rough? Flaky? Then you need enzymes! I can’t say enough about these unsung heroes of the skin care world. They eat dull, dead skin cells and leave the healthy ones, revealing softer, brighter, smoother skin without any harsh scrubbing. Enzyme masks or peels are a great option for your weekly exfoliation, and an alternative to abrasive bead exfoliants for sensitive, dry, or broken out skin.

$$$- Elemis Papaya Peel*- This is a UK brand I’ve gotten to know through work, and every time I use it in the treatment room my hands feel softer instead of dried out after a day of giving facials (I also use it on my face at home too!). The natural enzymes gives it a nice tingling sensation as it works, plus it smells amazing! You can find it in spas or here for about $45: http://shop.nordstrom.com/s/elemis-papaya-enzyme-peel/2889487?origin=category-personalizedsort

$- Alba Botanica Hawaiian Papaya Enzyme Facial Mask- Another dupe! This is one of the truly great drug-store (read: affordable) natural skin care lines; I was so excited when I found this and saw how well it compares to the ingredients in the Elemis one. There’s no synthetic fragrance and it smells just as good, it is also paraben and sulfate free, 100% vegetarian, and hypoallergenic! You can pick it up here for about $10: http://www.walmart.com/ip/Hawaiian-Papaya-Enzyme-Facial-Mask-Alba-Botanica-3-oz-Liquid/31635804


Dehydrated Skin-

As I’ve mentioned before, any skin type can suffer from dehydration (yes, even if your skin is oily!), a soothing cream or gel-based mask can be just the thing to balance out your skin, so it is a relatively easy fix. Anyone with mature skin can also benefit from some added hydration, as the moisture barrier in your skin breaks down over time. Look for hydrating ingredients like hyaluronic acid (which can hold 1000 times its weight in water) and soothing glycerin to lock in moisture. Most of the fun Korean sheet masks are great for added hydration, as the sheet provides a physical barrier to help the ingredients penetrate and prevents them from evaporating. They are also great against cold dry air in late fall and winter, or while traveling long distances. Sadly, not all of us are brave enough to wear sheet masks on planes or during long car rides, despite the added benefit of startling unsuspecting on-lookers! You can always try a cream-based mask instead, which will go on clear and can stay on longer. As always, drinking plenty of water will really help product absorption and moisture retention. 

$$$- Yon-Ka No.1 Intense Hydration Masque*- This one is another go-to for me in the treatment room when I really want to add some deeper hydration, especially on mature skin types. It feels super fancy and the soothing cream formula penetrates deep to hydrate, smooth, and repair the skin. It is made with desert succulents which time release moisture so the longer you leave it on the more it works. It even doubles as a night cream for some intense hydration (we’re talking a 96% increase in hydration!). It runs about $59 and has to be purchased through a spa that uses Yon-Ka products in the treatment room, you can find your closest location here: http://www.yonkausa.com/find-an-authorized-yonka-center

($)- Homemade Hydrating Mask- As any self-respecting Pinterest-lover can tell you: you can take just about anything from your pantry and put it on your face as a mask! That said, I recommend you proceed with caution and stick with the more gentle ingredients. After some research and careful consideration, I have come up with a homemade hydration mask which can include various combinations of the following ingredients listed below. You’ll need a few minutes to prepare it, and make sure to wear something you don’t mind getting dirty. Here is my favorite recipe:

¼ cup of ground oatmeal, you can even use instant, as long as it’s plain with no additives - this helps soothe the skin and gently exfoliates
½ of one mashed avocado (maybe put the other half on toast?)- it is super moisturizing and also works well in hair masks!
2 tablespoons of honey - moisturizing, breaks apart excess sebum, and is anti-bacterial so it helps with acne
1 tablespoon of coconut oil - the natural/homemade standby, super moisturizing and holds the mask together
Mix everything together in a bowl until combined and apply to your face for about 10-15 minutes, rinse clean. (Note: it’s totally up to your preference, but I find that simple, organic ingredients are best for these type of masks, that way you know exactly what you’re putting on your face.)


Bonus!-

Finally, I have a few honorable mentions that are just good all-around masks, especially for blackheads or noticeable pores:

$- e.l.f Hydrating Bubble Mask- One of the newest trends with face masks is carbonation or bubbling to help loosen debris and cleanse pores. I’ve been pleasantly surprised with the quality from e.l.f. products time and again, and this mask is no exception. Apply it to clean, damp skin (it will start bubbling automatically), leave it on for 5-10 minutes until the bubbles dissipate, massage in the excess, and then rinse with warm water. For about $14 you can get fresh, clean, hydrated skin thanks to fun little bubbles that foam up to clear out your pores! I picked mine up at Target, but you can also find it here: http://www.elfcosmetics.com/p/hydrating-bubble-mask


$($)- Yes To Grapefruit Correct and Repair, Pore Minimizing Facial Mask- This is from another one of my favorite drugstore natural skin care lines, Yes To... It's a sheet mask that uses citrus to help brighten dark spots as well as Vitamin C to help fight free radicals and environmental damage. It also hydrates and softens the skin, while the more astringent citrus and witch hazel helps tone skin and tighten the appearance of pores. When it's time to remove, massage in the excess product and moisturize, no need to rinse. You can find it here for $16, 5 individual masks come in a box: http://www.target.com/p/yes-to-grapefruit-5-ct-mask-pore-minimizing-facial-mask-treatment/-/A-17043366

Basically any of the sheet masks from the Yes To… line are fun and full of beneficial, natural ingredients! 

*Note: For those of you on California's Central Coast (or plan on traveling in the area) and interested in trying the Elemis or Yon-Ka masks, feel free to contact me via email at: info@skinhelpspa.com. These masks are a little harder to get a hold of than the others listed above, so if you have the opportunity the best way to try them is in a facial. I use them both in the treatment room and they are available for sale through the spas I work at. So, if you’d like to get a feel for how the product does on your skin let me know and I can see about scheduling you for a facial. 


Have a product you are not sure about? Are you wondering whether or not to get a particular facial service? Or is there a specific skin care concern you'd like me to cover? Leave it in the comment section below or shoot me an email. I'd love to hear feedback and any suggestions for future post topics!